Thursday, May 25, 2017

Adornit projects

Hi friends!  Two posts in one day?  I must be crazy.  I had time to play today and wanted to share some thing made for Adornit.  I am not sure if I shared I was on the Adornit girl Ambassador team? They have a wonderful and very inspirational Instagram page if you want to jump start some creativity.


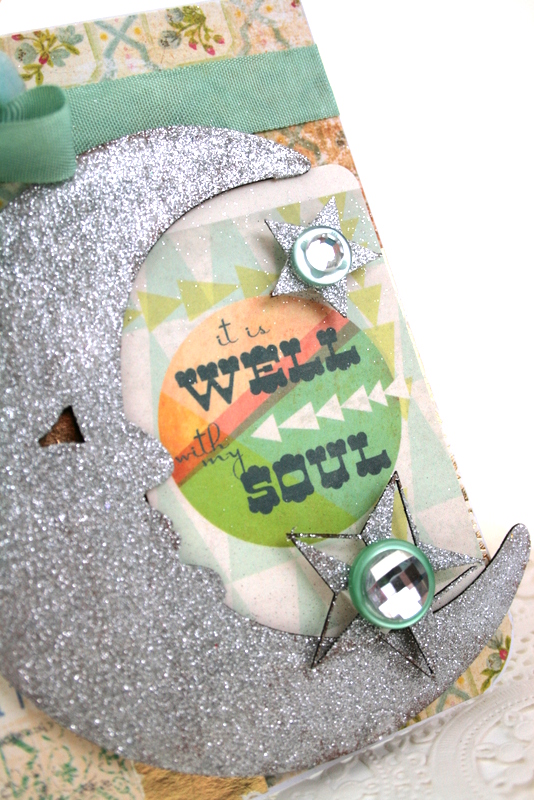
 Been having fun with my water colors and chalk pen. 


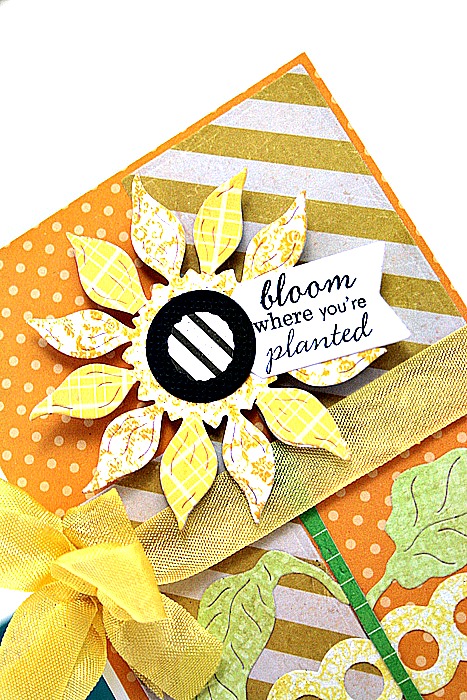
 Love mixing up some whimsy and shabby!


 I just love these colors so much!


 Pure happy I tell ya!


These whimsical goodies are available in my Etsy store.  Also if you are new to instagram, please come over and pay me a visit and follow along!  I share my home and some projects not seen over here!  My instagram page .  Nite nite friends, Cherry

Birds, blossoms, and butterflies

Hi Friends! My day at the RRR blog.

I have two altered layered tags to share. I used lipstick red and Mimosa yellow seam binding.

I have been enjoying mixing bright colors together lately.  Summer is almost upon on us and I am craving sunshine and warm breezes.  These tags remind me of long Summer days with the butterfly, birds, and blossoms theme.


 I adorned each one with lots of yummy embellishments, chipboard pieces, and Anemones pastel bunch flowers. 


 I also used gingham covered buttons from the store.


Well that is it for me today!  These are available in my Etsy store. Thanks for visiting, Cherry

Wednesday, May 24, 2017

Upcycled 4th of July Altoid Tin

  Always excited when it is my day over at the Gypsy Soul Laser Cut Blog!  I love to create with their chipboard.  I have the grand Independence Day on the brain and created this up cycled Altoid tin in honor of it.  I first started with the Altoid Inserts Fairy Tale Frame .
They were painted with silver metallic paint.  I trimmed one side down so I could fit it in the wider part of the Altoid tin.


 I than glittered the frames along with the stars from the Celestial Shape Set.


Next I covered the back side of the tin with pattern paper and than added handmade stitched paper fringe.


I inserted pattern paper and one side of the frame. 


 I adorned the one side with the glittered chipboard pieces and a sentiment sticker.


The other side of tin I added an old fashion image and than framed with the frame.


I added a few more stars and buttons to accent and was done!  Here it is complete.


I see more of these in my future...and minty fresh breath.  lol.  Thanks for visiting, Cherry


Gypsy Soul Laser Cut Supplies-
Altoid Inserts FairyTale Frames
Celestial Shape Set

Other supplies-
recycled Altoid Tin
paper fringe
stickers
glitter
adhesive
images
random buttons

Monday, May 22, 2017

Cheery Lynn blog Hop!!!

Happy Monday....time for a Cheery Lynn Blog hop!!!  You should have found your way here from Lisa's blog.  There is a fantastic new line up of goodies just in time for Summer! I made two cards using some of the cutest dies.  First up the new Sunflower die.  It is so pretty.

 I cut the sunflower petals out twice and paper pieced the petals with two different floral papers.  I also used the tags four die set to stamp my sentiment.  For the middle of the sunflower I layered it with the other sweet older Sunflower die. 


 I love this die and will be using it a lot.


My next card is just plain fun!!!  Would be perfect to use for someone's Summer birthday!


    I used the new Whimsical sun and cloud 4 piece die set to create this fun scene along with the new flip flops and board shorts die. 


 I love that sweet sun!!!  Adorable!


Well that is it for me....next stop on blog is Bonnie's blog.  Have fun and be inspired!  Cherry


Cheery Lynn dies-

Friday, May 19, 2017

RRR anything but a card challenge

   Today we have a new challenge up at the RRR blog!  It is an anything but a card challenge.  We hope you will play along with us!  I had this vintage star tart tin and created a fun altered tin for Memorial, Flag, or 4th of july.  Which ever one takes your fancy. 


 I wrapped it with handmade sewn crepe papers in red, white, and blue.
Inside I added diecuts and a sweet fussy cut image. I also added a little open rose in royal blue


 I topped it off with ribbons from the May ribbon club assortment.


Close up of the paper fringe.


Well that is it for me......Cherry

Thursday, May 18, 2017

Cheery Lynn card

Hi there...it is my day at the Cheery Lynn blog.  I have a simple little card to share.  Sometimes I like to leave a card with out a sentiment so it can fit any occasion.


 I used the 3d dahlia flower stackable for my main focal point.  I added buttons to the top of them and used the Build a flower #1 Petals/leaves for my leaves.


 From here I added the Curls and swirls embossing folder  at the bottom as a border.


That is it for me.....Thanks for visiting, Cherry

Cheery Lynn Dies-

Monday, May 15, 2017

It is well with my soul

Hi there...my day over at the RRR blog. I created an encouraging uplifting card with shabby details .


 Using Bay Leaf seam binding I tied it around the top of my card and created a shabby bow. I tucked in vintage stick pins, pom poms, and a Cherry blossom.


I used chipboard from GSLC painted it, inked, and glittered the moon and stars and used foam adhesive to create dimension.


I added my sentiment layering it below the moon and added stars stacked with buttons and rhinestones. 
That is it for me today!  Thanks for visiting, Cherry

Saturday, May 13, 2017

Really Reasonable Blog Hop

Yipppppppppppeee it is Really Reasonable Ribbon blog hop day!  Sounds like a national holiday doesn't it?  There should def. be a ribbon holiday.  Stat.  You should have found your way here from Kathy's gorgeous blog.  If at anytime you find yourself lost, just make your way back to the RRR link above.  Look at this gorgeous Ribbon.


Here is my card for the blog hop! Just a fun patriotic card.  Perfect for Memorial day, flag day, or 4th of July!


Okay folks your next stop is to Linsey's gorgeous blog.  Happy Hopping!  Cherry

Wednesday, May 10, 2017

Patriotic card

Hey there Gypsy Soul Laser Cut peeps!  Happy Wednesday.  Today I have a vintage style Patriotic card to share with you. 


 I started first by painting my chipboard pieces with chalk paint in red.  I purposely left certain areas non painted for a fun weathered look. 


 I than covered my cardstock with papers in a red, white, and blue theme.


 I than added my chipboard Word frames along with a vintage milk cap.


I than added my ribbons, a straw, and the Banner Border strip.


 Other than that a USA sticker was added and a bit of distressing with a chalk paint pen.


 I love using a mix of old and new to create something one of a kind!


Thanks for visiting the blog today!  Cherry

Gypsy Soul Laser Cut Supplies