Saturday, December 7, 2013

Pillowbox tutorial


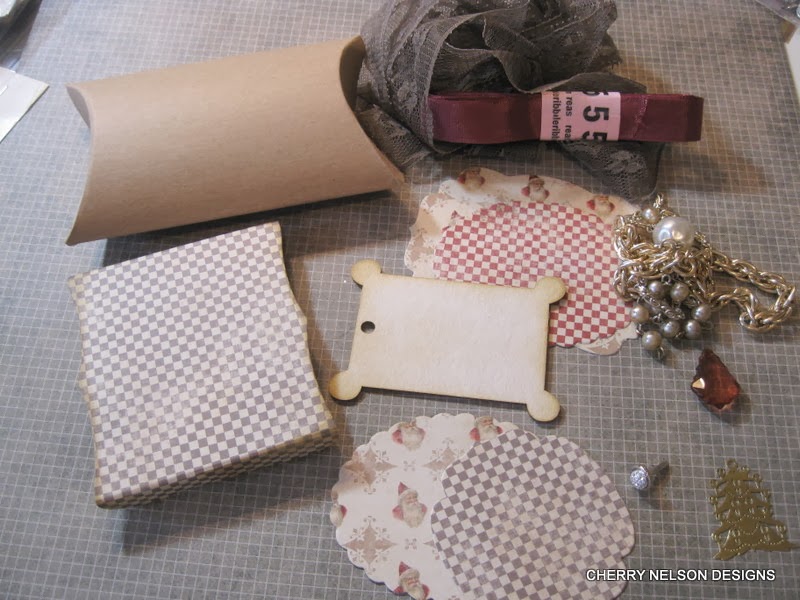
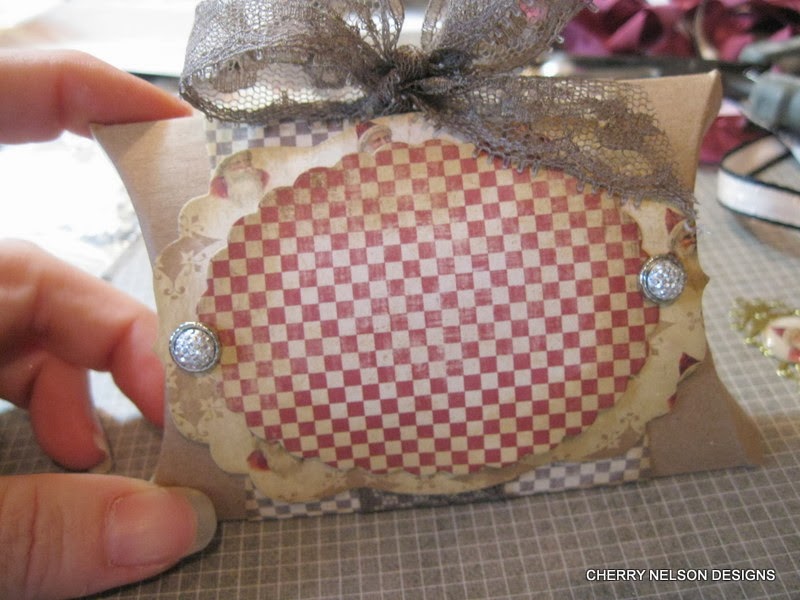
Hello to you and Merry Christmas!  I have a simple little tutorial on decking out a simple kraft pillowbox using some yummy Riddersholm goodies.  Gather the goodies you want to use and a pillowbox base and we are ready to go.  I used a pillowbox from Wplus9 designs but there are many simple templates for free online as well.  I started by diecutting a few layers of papers from the NEW Our Country Christmas paper pad.  Wrapping the largest layer around the pillowbox and adhering.   Than simply wrapping my lace around the box and tying a big bow at the top.  From there, layer the next diecut and adhere with some gorgeous glitter brads from the store.  I used a wood scallop tag for my vintage image from the I believe collection.  Riddersholm has some of the neatest chipboard/wood pieces.  It is all about the layering process for me....after adding the wood tag/image I added some vintage pearl baubles and a metal charm with a sweet little Santa image from the Country Christmas line.  I used an epoxy bubble cap to cover him.  From here a little more ribbon and twine and it is complete.  This little cutie is ready to fill with candies.....preferably Hersey kisses.  My favorite!  Hope you enjoy!  hugs, cherry

Friday, December 6, 2013

Christmas greetings..


   Happy Friday friends!  We are all  hunkered down in our home....the snow is flying outside and our temps are freezing.     This weather forces you to slow down so I thought I would pop in and share some cards I have been working on lately. 
                         I love dog cards...no secret there.   Especially Terriers.  The first one I used  an image from my stash and a postcard image from Crafty Secrets creating with Retro cd.    I used papers from Pretty Little Studio and other little bits and bobs.   I have been GOOD this year..I have not bought ONE piece of new Christmas paper.  I have so much..I could mix and match till the cows come home.  The second again is all old papers just simply mixed together with another image from my stash.   My third card uses an image from the Graphic Fairy.   I fell in love with this holly jolly flapper girl.  I took a Maya Road flower apart and mixed in some Prima flower bits.  I love the way this card turned out....happy and full of Christmas cheer!   Of course my ribbons are all RRR.  I go through tons of red seam binding this time of year.  Never tire of it!    Make sure to check out  my etsy store if you get time...it is full of Christmas goodies Cherry's Jubilee store.   Hope you are all safe and sound...and warm!  hugs, cherry


Tuesday, December 3, 2013

Christmas pups...


December 3rd....countdown to Christmas is here!  I have a couple whimsical cards to share made for RRR.   Never grow tired of dog cards...especially Christmas ones.  I used some fun Pretty Little Studio goodies along with papers scraps and other finds.  Lots of seam bindings were used for the bows , velvet, and Maya Arts natural crochet lace, along with Samantha white crochet lace.  So many fun Christmas ribbons and doodads...so little time.  I never do all that I  have in my mind's eye...but I guess there is always next year!  Hope you enjoy!  hugs, cherry

Monday, December 2, 2013

Crafty Secrets Linky party..


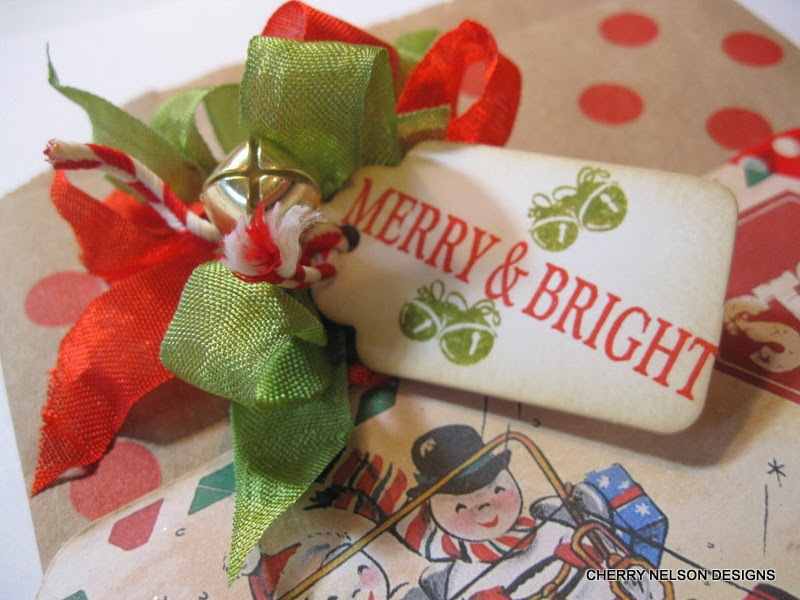
Hi there...first Monday of the month means fun over at the Crafty Secret Blog .   We have a Christmas/holiday theme going on.  I created a retro gift bag..perfect for a gift, a few yummy cookies, or candy.  I used an image from the Creating with Retro  cd.   As you can see I gathered up a few goodies and used my polka dot kraft bag as my base.  I added some Washi tape to the corners of the image and mini jingle bells.  Added pom pom, more Washi, and some handmade crepe fringe to the bottom.  Other than that....ribbons at the top along with a stamped tag and another jingle bell and it was finished.  Make sure to check out the other gals goodies!   hugs, cherry

List of DT Blogs
Vicki Chrisman Design Team Leader

Sunday, December 1, 2013

Bingo challenge.......


December 1st.....and I couldn't be happier!   Christmas season is here...got your chestnuts roasting yet?  I am decking my halls to the hilt this year! We have our first of the month challenge going on over at the  Really Reasonable Ribbon blog.  It is the only challenge for the month of December, so please join us!
              It is a really fun and unique bingo challenge!  Use any three items on our bingo board, be it horizontal, vertical, or diagonal and create a project.  Don't forget to add your ribbons!  I used both red lipstick seam binding and black gingham 3/8 ribbon to go along with my black, white, and red color scheme.  I love using white and black at Christmas time.   Been using it the last couple of years and than adding one other color to it to create a pop.  Works so well with old nostalgic Christmas images I think.  Well off to finish my decorating!  Have fun...and join us!  hugs, cherry

Saturday, November 30, 2013

Merry and bright............


Did you have a most warm and yummy Thanksgiving?   Hope so!  I popped in to share a few sweet Crafty Secrets images with you.  I used the Merry Christmas creative scraps on both cards.  The first card also uses the back side of it.  The silhouette border image you see at the bottom.  Two different looks...one more traditional and the other retro with my fave red and aqua!  Can't wait...about ready to get my totes out and deck the halls!  Make sure to visit the Crafty Vintage Girl home page there is a Black Friday sale going on right now!  Better get crackin on those Christmas crafts!  Hope you enjoy!  hugs, cherry

Saturday, November 23, 2013

Altered mini bell tart pan ornament


Hello and Happy soon to be Thanksgiving!  Cherry here to share a little tutorial for RRR on creating a unique ornament that you can keep for your tree this year or give as a gift. So many fun things that you can alter and put your own creative touch too!  I recently found a few little vintage bell tart pans and decided to create some ornaments from them.  I gathered some goodies including some oh so yummy lace blue seam binding, .  I also gathered up fun embellishments I thought would go well with my shabby blues.    I used my Scor-buddy mini scoring tablet to create an oval rosette and set it aside.  I decided to spray paint my tart pan and than lightly glittered it with mica flakes.  From there I glued my rosette into place and layered with a glitter star and my little girl image with a glass cabochon.  I added some vintage tinsel around the rosette as well. 
To the top of the bell I added heaps of seam bindings, a vintage millinary bird, some little baubles, and a large oversize ring clip that I slid a stamped tag and jingle bell too. From there it is simply ready to wrap or hang on your tree!  I love the soft icy blues and silvers!  Hope you enjoy!  hugs, cherry