Wednesday, December 21, 2016

Holiday Traditions

                    This is one of Two posts for today!!!!!
                        In a couple of days we will see another Christmas eve come and go.  It always makes me a bit sad but also makes me appreciate slowing down  Taking it all in and just being in the moment.   Appreciation of our families and traditions.
                                     Sharing OUR family traditions and the last of my Christmas projects of this year.  One of my favorite traditions to do each year is just to snuggle up in jammies and hot cocoa and watch old movies.  "It's a wonderful life" with Jimmy Stewart, another would be "the man that came to dinner", and also "a Connecticut Christmas." Those are few of my favorites.  I never tire of them and often wish I could be brought back to that era.
                                 I am sure that has something to do with the type of projects I gravitate towards.   I started with a wood clock base and turned it inside out and painted it.  Than I added a neat knob to the top layered with snowflakes and ribbons, along with berries and some flowers.


 I added several stickers from the Classic Christmas collection from Authentique.   Also several poinsettias and botanica flowers.  They all work so well together!


I painted and distressed all the edges for a worn appearance.   I just love this christmas saying. 


 Here it is all done and ready!  Great little Christmas shadowbox


Well that is it for me!  Stay close to you and yours....and your littles...and enjoy!!!!  Hope you enjoyed my sentimentality and my project.  cherry


Tuesday, December 20, 2016

Guesting at Cheery Lynn again today!

Hi there paper peeps!  I am guesting on the Cheery Lynn blog again today.  Can you believe Christmas is just days away?  I have another Christmas card for you today.  This time using the Christmas Tree shaker die.  I cut it out three different times using different but matching papers for uniformity.  I wanted my middle tree to be my focal point so I used foam adhesive to add dimension to it. 


 I added buttons and jingle bells to each one but added the Christmas lights swag two piece die set to the middle to make it special.  Instead of using the "light bulbs" from the set though I used the hearts from the Ornament #1 die.  Which I also used at the bottom and the top of my card paired with the "negative" space from inside the Swedish Spring oval frame die


I added a bit of seam binding as well for softness and color and my card was done! I love this non-traditional color combination.  Pinks, aquas, and reds. 


Hope you enjoyed today's card!  Cherry

Cheery Lynn Dies used:

Other supplies used:
 Really Reasonable Ribbon

Thursday, December 15, 2016

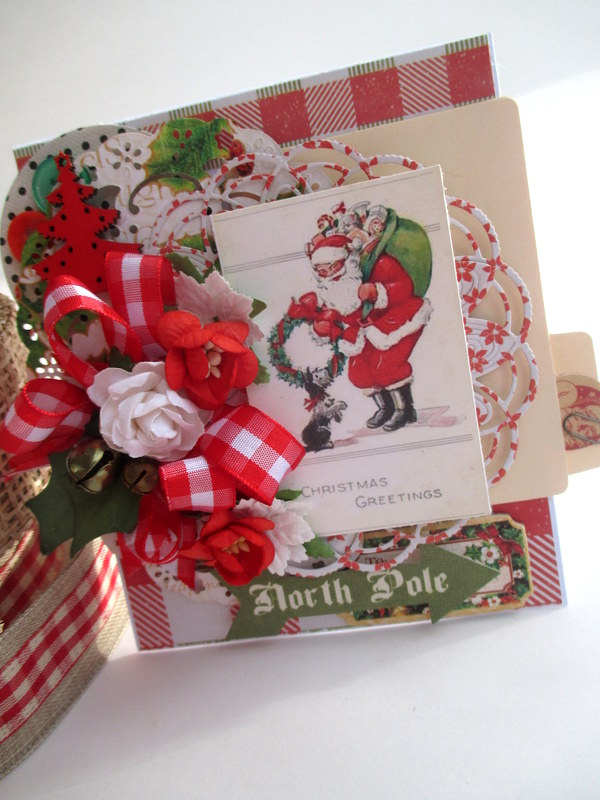
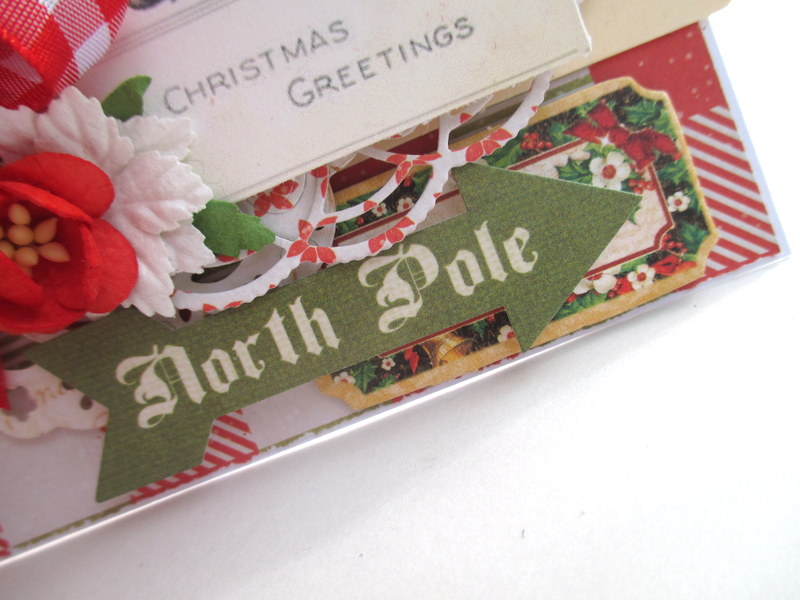
which way to the North Pole?


Hello folks!  Popping in real quick between baking, shopping, and yes still decorating!   Nothing like the last second.  This card was made for RRR and uses the red bold check ribbon.  Such a happy ribbon. 


 I also used Wild Orchid Cherry blossoms in red and a white rose nestled among my ribbons. 


Well I am off to finish up somethings....enjoy!  Cherry

Wednesday, December 14, 2016

Gypsy Laser Cuts Guest Post

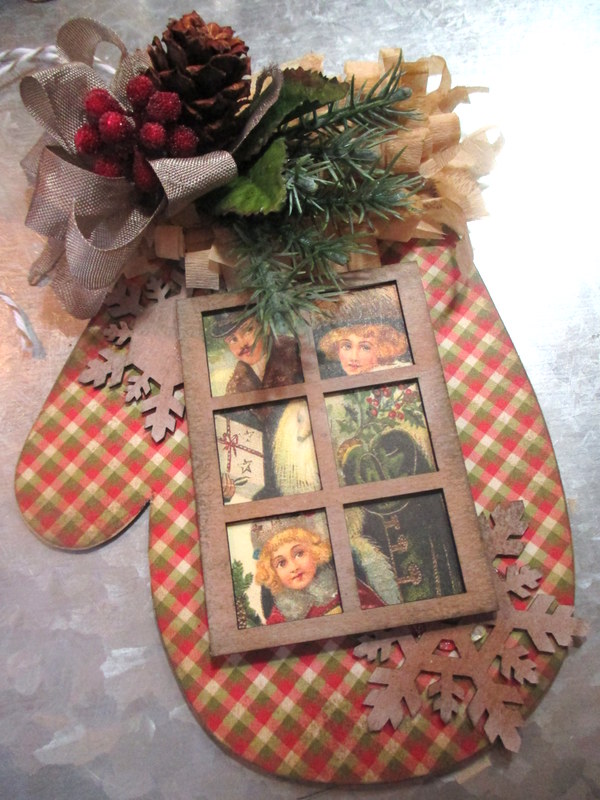
              Hi folks...the count down continues to Christmas!!!  Today I am up at the Gypsy Laser Cuts blog again.  So excited to be joining in with GLC girls!  Today I have an old fashion mitten ornament to share.  I used the Mitten mini album.
               Here is a quick little tutorial for you!  I started by tracing my mitten onto pattern paper.  I used some gorgeous plaid paper from Authentique.  I love the homespun quality...perfect for my mitten. 


 Than cutting it out and adhering it onto the chipboard mitten.  I sanded and distressed the edges a bit.


Gather up the GLC goodies you want to use to add personality.  I decided to use a fun Victorian image to pair with the Windows 4 panel set.   I also used the snowflake shape set.  I inked my chipboard pieces with a bit of white ink and aged them lightly.  I wanted to keep the kraft color but add a bit of white for a Winter appearance. 


 I made some handmade paper fringe using some vintage crepe paper.  I inked the edges for an aged look.  I wound some twine through the edge so the mitten can be hanged or tied to a package this holiday. 


 I started adding some goodies to the top of my  mitten...adding seam binding, pinecone, berries, and greenery. 


 Next I layered my Victorian family onto my snowflakes


 Last but not least I added a sentiment using the Words and phrases set.  I added some faux snow and some rhinestones and was done!


Here it is done!  All ready to hang on a tree or tie to a pretty package. 


Thanks for visiting me today!  hugs, Cherry


Tuesday, December 13, 2016

RRR blog hop time!

                Hello there!  Time for blog hopping with RRR!  You should have found your way here from Kathy's beautiful blog.   If at anytime you get lost just click on link above , it will take you back to the RRR blog.  Here are this month's fab ribbons.  Aptly named "Winter Blues"...but I promise they won't give you those...they will do just the opposite. 


Here are my projects.  I decided to make two cards because I just could not stop at one.  Kinda like potato chips..am I right?


I used the club ribbons along with Sharon white crochet lace on the bottom and top of my card.  I wound a bit of Navy blue burlap string with my bows.  I also added some gorgeous acyrilic rhinestones to my flowers and added faux snow to give it a bit of frost. 

                 Here is my next card.  I used some lovely chipboard pieces that I texturized and glittered. 


Well that is it for me!  Your next stop is at Linsey's gorgeous blog.  Have fun folks!  Cherry


Other supplies used- Gypsy Laser Cuts

Sunday, December 11, 2016

The bells are ringing card guesting for Cheery Lynn

Hi folks..I am guesting again over at the Cheery Lynn Blog  today.  I have another fun Christmas card to share.  I finally got to make my first ever shaker card.  What fun they are to make!  I used the Bell shaker die set along with the clear acetate sheets to keep all my little doodads in place.


 I enjoyed trying to think outside the box as to what I wanted to use inside. Can you believe I didn't have any sequins?  Not a one!   I used mini beads, pearls, and than decided it would be fun to use the mini hearts that are left over from the beautiful Ornaments #1 die.


I cut them out of both white and a red pattern paper.  I also used the ornament #1 die as two layers under my bell along with the Swedish Spring Oval frame.


I decked out my bell a bit with greens from the Joy to the World wreath and the flourishes  from the Fall Pumpkin Patch die set.  I than topped it off with a bit of ribbon, faux berries, and a glittered jingle bell. 


A cute little card....ready for your own Christmas sentiments!  Can't wait to play more with these shaker dies!  Hope you enjoyed my card!  Cherry


Cheery Lynn Dies and supplies used:  

Other Supplies used:
Really Reasonable Ribbon

Friday, December 9, 2016

Altered block

Hey paper peeps, Cherry here to share today!!   Are you ready for more blog hop fun?    I know I am!  Happy to share what I created for this special occasion.  I started out with a solid wood block that I gave a good coat of paint too.  I than covered each side with papers from the Classic Christmas line.     I layered snowflakes, Santa images, little trees, and gorgeous mini poinsettias to each side as well for interest. 


From here I added, painted, and distressed, round legs to the bottom of the block.


 I sanded and distressed each edge where the corners met up to give it a aged worn appearance.  I also used antiquing gel glaze to age images. 


Love the imperfection and the bit of paint peeking through.


Some sides also got some berry pine picks to add to the theme.


 I added a snowflake to the top and layered a nice heavy drawer knob to top for whimsy


 Here it is all done!!!  I love how it turned out...hope you do too!  Cherry